10 Tips to Organize Kitchen Drawers Efficiently
Kitchen drawers can quickly turn into cluttered catchalls, making it hard to find the tools you need. If you’re struggling to keep everything in its place, you’re not alone. These tips to organize kitchen drawers efficiently can help you create a setup that’s easier to use and maintain.
Start by sorting items by category and clearing out duplicates, broken tools, and clutter. Measure each drawer before buying dividers so everything fits well.
Use trays, inserts, and adjustable dividers to give utensils, small gadgets, and bulky tools their own spots. Label sections so you can reset them quickly, and do a quick weekly check to keep things tidy.
A few smart tweaks can make your drawers work even better.
Key Takeaways
- Empty each drawer, sort contents by category, and remove duplicates, broken tools, and unused items.
- Measure drawer dimensions first, then choose organizers that fit the space and avoid obstructions.
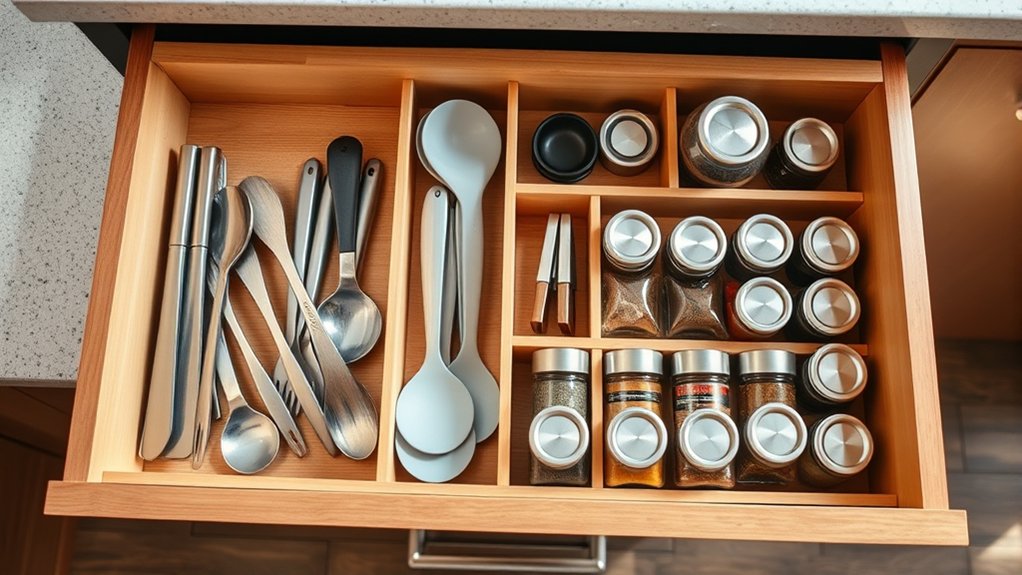
- Use dividers, trays, and inserts to create clear zones for utensils, gadgets, and small items.
- Store frequently used tools in easy-reach drawers and keep bulky or heavy items in deeper spaces.
- Maintain order with weekly reset checks, relabeling, and wiping crumbs to prevent clutter from returning.
Sort Kitchen Drawer Items by Category

Start by emptying the drawer and grouping everything into clear categories, like utensils, cooking tools, measuring items, and odds and ends. As you sort, keep like with like so you can see what you actually use and what belongs elsewhere.
Place each fork, spoon, whisk, and spatula with similar items, and set aside every Kitchen gadget in its own group. Gather measuring cups and spoons together, then collect small containers, including any spice container, so you can judge how much space they need.
This step helps you spot patterns, choose the right dividers, and plan each section before anything goes back in. If you work through one category at a time, you’ll avoid clutter and make the drawer easier to maintain.
Clear Out Duplicates and Junk First
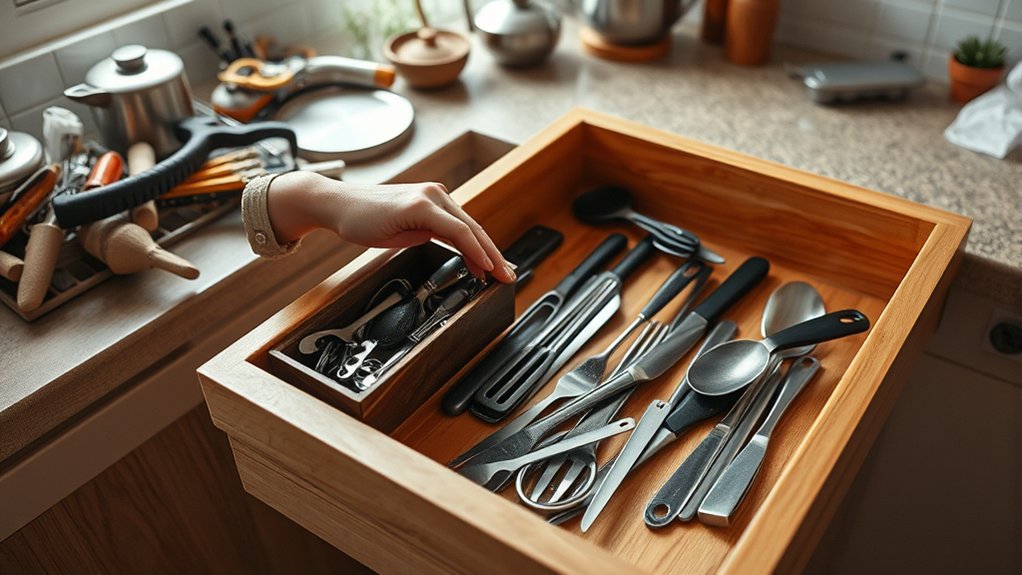
Now that everything is grouped, look closely at each category and remove extras you don’t need. Keep only the tools you actually use, and let go of duplicates, broken gadgets, and mystery items that have sat untouched for months.
Remove extras you don’t need, keep only the tools you use, and let go of duplicates.
If you have three spatulas but reach for one, keep the best one and donate or discard the rest. This step makes Kitchen cleaning faster because you’re not working around clutter.
It also supports better drawer maintenance by reducing wear, preventing overcrowding, and making every item easier to find and return. Check for old twist ties, dried-out pens, bent clips, and worn peelers that no longer work well.
Toss anything unsafe, and set aside reusable items for donation if they’re still in good shape. When you clear the junk first, the remaining items feel more intentional, and your drawers become easier to keep tidy every day.
Measure Kitchen Drawers Before Buying Organizers

Before you buy any bins, inserts, or dividers, measure each drawer’s interior length, width, and depth so you know what will actually fit. Use reliable measuring tools, and write down the drawer dimensions for every space, even shallow ones. Small differences matter, because a half inch can turn a perfect plan into wasted money. Measure from wall to wall, then check for obstructions like screws or runners that reduce usable space.
| Drawer | Length | Width |
|---|---|---|
| Top | 18 in | 12 in |
| Middle | 22 in | 15 in |
| Deep | 24 in | 18 in |
| Utensil | 20 in | 10 in |
| Prep | 21 in | 14 in |
Keep your notes with you when shopping, and compare package labels carefully. When you match organizers to exact measurements, you avoid returns and get a cleaner, more efficient kitchen setup overall.
Choose Drawer Dividers That Fit Your Tools
Once you know your drawer sizes, choose dividers that match the tools you store most often, from spatulas and whisks to knives and serving spoons. You’ll keep everything visible when each item has a clear slot, and you’ll waste less time digging through clutter.
Pick custom drawer dividers if your utensils vary in length or shape, because they let you tailor each section to your exact setup. If your collection changes often, adjustable storage solutions give you flexibility without forcing you to start over.
Look for sturdy materials that won’t slip when you open and close the drawer, and choose smooth edges so your tools don’t snag. Group similar items together, such as baking utensils, everyday cooking tools, and meal prep accessories, to make grabbing what you need faster.
When your dividers fit your tools well, you’ll create a drawer that stays orderly and works with your cooking habits.
Store Bulky Tools in Deep Kitchen Drawers
Store bulky tools in deep kitchen drawers to keep them within reach without crowding smaller items. Group similar oversized utensils, pans, and gadgets together to stay organized. This way, you can make the most of your drawer space and clean up faster.
Deep Drawer Storage
Deep kitchen drawers make it easy to store bulky tools that won’t fit well in standard shallow drawers. You can tuck in stand mixers, roasting pans, and heavy gadgets without stacking chaos on top.
Add custom drawer lighting so you spot items quickly, even in dim corners, and line the base with non slip drawer mats to keep everything steady. Use dividers to give each tool a clear home and prevent clanging when you open the drawer.
- A deep drawer glowing softly
- A mixer resting beside measuring tools
- A roasting pan sliding into place
- A mat holding each item snugly
Organize Bulky Utensils
Big utensils like ladles, tongs, spatulas, and whisks can quickly clutter a drawer if they’re tossed together, so give each one a defined spot in a deep kitchen drawer. Use dividers or adjustable inserts to keep handles aligned and blades or heads separated.
You’ll find items faster, and you won’t have to dig through a mess while cooking. Group specialty utensils together, such as mashers, peelers, or frosting tools, so you can grab them when needed.
Keep bulky kitchen gadgets, like can openers or hand mixers, in the back or in deeper sections to save space. If a tool fits better upright, store it that way in a container inside the drawer.
Revisit the layout often, and adjust it as your cooking habits change.
Keep Everyday Utensils Within Easy Reach
Keep your most-used utensils in the top drawer or the one closest to your prep area. That way, they’re always easy to grab. Group spatulas, spoons, and tongs together, too. It’ll make cooking smoother and save you time.
Frequently Used Utensils
For the utensils you reach for every day, make convenience the priority. Keep spoons, spatulas, tongs, and peelers in the front of the drawer so your hand finds them fast.
Group each item by task, and use shallow dividers to stop clutter from creeping in. If you rely on specialized utensil types, like zesters or serving forks, keep them nearby but separate.
Choose ergonomic storage solutions that let you lift tools with one easy motion, not a deep dig.
- A row of wooden spoons lined up like pencils
- Bright measuring cups nesting in a tidy stack
- A slim peeler resting beside a whisk
- Silicone spatulas fanned neatly in a tray
Smart Drawer Placement
Place your most-used utensils in the top drawer or the easiest-to-open section, so you can grab them without pausing mid-task. Smart drawer placement keeps cooking smooth because you aren’t bending, searching, or shifting clutter.
Use an ergonomic drawer layout by grouping items by task and frequency, then keep daily tools front and center.
| Drawer Zone | Best Items |
|---|---|
| Top front | Spatulas, spoons |
| Center drawer | Knives, peelers |
| Lower easy-glide | Measuring cups, tongs |
| Side insert | Whisks, scissors |
This setup saves time, reduces strain, and helps you return items where they belong. You’ll move faster, waste less motion, and keep your kitchen organized without extra effort.
Create Prep and Serving Zones in Kitchen Drawers
- Sharp knives tucked in a protected drawer slot
- Cutting boards stacked upright or flat nearby
- Serving utensils lined up by the dining side
- Napkins and trivets ready for the table
Store Small Items in Trays and Inserts
Use trays with dividers to keep small kitchen items from sliding around in your drawers. You can also sort inserts by purpose, giving each tool its own place and making it easy to grab. This creates clear zones for small items, so your drawers stay neater and are faster to use.
Tray Dividers
Tray dividers can turn one messy drawer into a set of tidy little zones, making it easy to separate utensils, measuring spoons, clips, and other small items.
You can choose custom tray designs that fit your drawer’s exact width, so every piece has a place. With adjustable divider options, you can shift sections as your tools change, keeping chaos from creeping back in.
- Small spoons lined in a narrow slot
- Clips resting in a shallow square
- Whisks tucked beside spatulas
- Labels peeking above each section
These trays help you scan quickly, grab what you need, and return it without digging through clutter. When you use clear zones, you’ll save time, reduce noise, and keep your kitchen feeling calm, orderly, and ready for daily use.
Insert Organization
When you add inserts to your kitchen drawers, you give tiny items a proper home instead of letting them drift into a jumble. Choose shallow trays, silicone cups, or adjustable inserts that match your utensils and gadgets, so each piece stays visible and easy to grab.
Use color coding to separate measuring spoons, twist ties, and pens at a glance, which helps you return everything quickly after use. Clear acrylic inserts work well if you want a clean look, while bamboo adds warmth.
Good drawer lighting also matters, since it lets you spot small items fast without rummaging. Measure before you buy, then test the layout and tweak it until the insert system feels natural.
Small Item Zones
Group your smallest kitchen items into dedicated zones so they don’t vanish in deep drawers or slide into messy piles. Use trays and inserts to separate measuring spoons, twist ties, bag clips, and tea packets, then label each section so you can grab what you need fast.
Innovative storage solutions like adjustable dividers help you fit odd-shaped tools without wasting space, while ergonomic drawer layouts keep frequently used items front and center. You’ll cut clutter and protect delicate pieces from getting scratched or tangled.
- shallow compartments for spice spoons
- slim trays for peelers and zesters
- snug slots for corkscrews
- small cups for rubber bands
Label Drawer Sections for Easy Resetting
Once you’ve assigned each drawer section a purpose, label it so everyone knows where things belong and can reset the space quickly. Use simple words, icons, or tape tags, and pair them with color-coded categories to make each zone instantly clear. When you can see what goes where, you’ll spend less time hunting and more time cooking.
| Section | Label | Color |
|---|---|---|
| Knives | Cutlery | Red |
| Spatulas | Tools | Blue |
| Measuring | Baking | Green |
Keep labels consistent across drawers, and place them where you can read them without opening every divider. If one section holds mixed tools, name the main use, not every item. That way, you’ll know exactly where to return things after dinner prep, and anyone helping in the kitchen can restore order in seconds. Clear labels turn your system into a habit, not a chore.
Do a Quick Weekly Drawer Check
Set aside a few minutes each week to scan your drawers and put stray items back in their labeled spots. You’ll keep spoons with spoons, wrap with wrap, and gadgets where you can grab them fast.
This quick habit stops clutter from piling up and makes drawer maintenance feel easy instead of endless. As you wipe crumbs or reset dividers, notice anything bent, broken, or missing, then fix it before the mess spreads.
During seasonal cleaning, you can use the same check to toss duplicates and return seldom-used tools to higher storage.
- A neat utensil drawer with forks lined up like piano keys
- A tape measure curling beside a tidy junk drawer tray
- Freshly folded napkins stacked beside small kitchen tools
- Sunlight catching clean wooden dividers and empty corners
When you finish, your drawers will open smoothly, look calmer, and stay ready for busy cooking days.
Frequently Asked Questions
How Do I Organize Kitchen Drawers on a Tight Budget?
You can organize kitchen drawers on a tight budget by using budget friendly storage you already have. Repurpose cardboard, cereal boxes, or small containers as DIY divider solutions, then group items by type and frequency.
Measure each drawer first, trim liners from old shelf paper, and label sections with tape. Keep only what you use often, and donate duplicates. This simple system saves money and makes every drawer easier to use.
What Materials Work Best for Long-Lasting Drawer Organizers?
You’ll get the longest life from bamboo, solid hardwood, stainless steel, and thick BPA-free plastic. Their smooth edges and sturdy builds resist warping, cracking, and daily wear.
Picture a drawer opening to neat, warm wood or sleek metal, with each divider holding firm. Prioritize durability and choose organizers with nonslip features so trays stay put when you slide drawers. Avoid flimsy cardboard or thin plastic that bends easily.
How Can I Keep Drawers Organized With Kids in the House?
You can keep drawers organized with kids by using childproofing tips like safety locks, soft-close slides, and low-risk drawer zones. You’ll also want drawer labeling strategies so everyone knows where things belong.
Assign one drawer for kids’ items and use clear bins to separate supplies. Teach simple cleanup habits, and rotate clutter out regularly. When you make access easy and rules clear, your drawers stay neater longer.
Which Items Should Never Be Stored in Kitchen Drawers?
You shouldn’t store sharp knives, heavy appliances, or anything wet in kitchen drawers; oddly enough, that’s when accidents and messes seem to happen most. Keep raw food, cleaning chemicals, and loose batteries out too.
For safe utensil placement, use dividers and reserve drawers for dry tools only. For smart spice storage, move jars to a cool cabinet or rack, since drawer heat and humidity can ruin flavor fast.
How Often Should I Replace Worn-Out Drawer Dividers?
You should replace worn-out drawer dividers as soon as they crack, warp, loosen, or stop fitting securely—usually every 1 to 3 years with regular use. Good drawer divider maintenance means you check them monthly and clean them often, so you catch damage early. If they’re no longer protecting your items or keeping sections tidy, replacing worn out dividers right away saves you hassle and keeps your drawers organized.
Conclusion
With a little effort, you can turn messy kitchen drawers into a system that works for you. When you sort items by category, clear out clutter, and use the right dividers, everything has a place. Deep drawers, trays, and labels help you stay organized and reset fast.
Do a quick weekly check so things don’t spiral again. With these tips to organize kitchen drawers efficiently, your drawers can stay neat and ready for anything.