How Do You Build a Kitchen Island in 5 Steps?
Building a kitchen island can feel like a big project, especially when you’re trying to balance storage, style, and limited space. You’re not alone—many people struggle to figure out where to start.
This guide explains how to build a kitchen island in five steps, from planning the layout to adding the finishing touches.
Key Takeaways
- Measure the room and plan island placement for clear walkways, seating overhang, and good traffic flow.
- Gather tools, lumber, plywood, fasteners, adhesive, trim, and any lighting materials before starting.
- Build a square, level frame on a flat surface, adding blocking for support and wiring access.
- Install shelves, drawers, or cabinets, then fit and secure the countertop with proper overhang and leveling.
- Finish with sanding, paint or stain, trim, hardware, electrical hookups, and final positioning.
Plan Island Dimensions and Placement

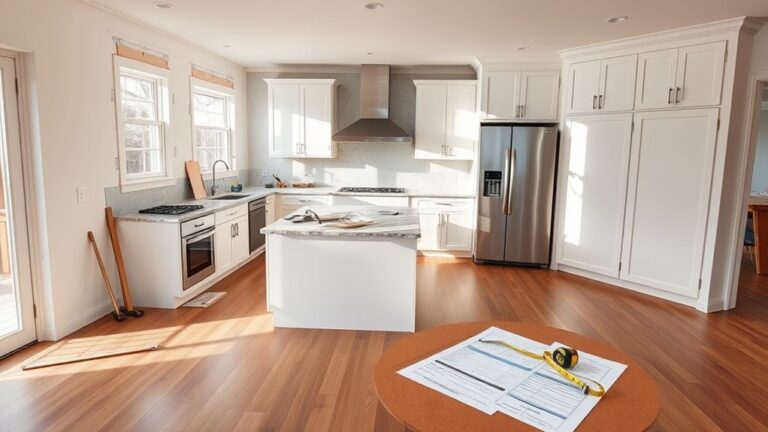
Before you cut a single board, map out your island’s size and location so it fits your kitchen and your workflow. Measure the room, then mark clearances around cabinets, appliances, and walkways. You’ll want enough space to open doors and move comfortably, but not so much that the island feels disconnected. Aim for a shape that supports how you cook, prep, and serve.
Place the island where it improves traffic, not where it blocks it. If you need seating, allow extra overhang and keep the longer side facing the room. Think about sightlines too; your island should complement existing cabinets and trim without crowding them.
Choose proportions that suit the room’s scale. A compact kitchen needs a smaller footprint, while a larger space can handle more surface area. Add Decorative accents only if they don’t clutter the design, and plan Lighting options above the island so the workspace stays bright and inviting.
Gather Your Tools and Materials

Once you’ve settled on your island’s size and placement, collect everything you’ll need so the build moves smoothly. Lay out your tape measure, level, square, drill, saw, screws, clamps, and safety gear before you start.
Also gather plywood, lumber, adhesive, trim, primer, paint, and any decorative accents you want ready for later. If you plan to add electrical features, choose lighting options now so you can account for cord paths and fixture space.
| Tool or Material | Purpose |
|---|---|
| Tape measure | Check dimensions |
| Level | Keep surfaces true |
| Drill | Drive fasteners |
| Plywood | Form panels |
| Paint and trim | Finish the look |
Sort items into piles, then stage them near your work area. When everything’s within reach, you’ll waste less time searching and more time building with confidence and accuracy.
Build the Kitchen Island Frame

Start by laying out the island’s frame on a flat surface, using your measurements to mark the top, bottom, and side pieces. Cut each board squarely, then dry-fit the frame to confirm it matches your plan.
You’ll get cleaner joints if you predrill the pieces before driving screws. Assemble the base with wood glue and screws, checking every corner with a carpenter’s square so the frame stays true.
If your design includes electrical wiring, leave the needed openings and routing paths in the structure now, before you close anything in. Add blocking where extra support is needed, especially near overhangs or future fixture points.
As you work, keep the frame level and stable, tightening fasteners as needed. Once the structure feels solid, sand any rough edges and make sure the frame is ready for decorative accents that you’ll add later.
Add Storage and Install the Countertop
With the frame solid, you can add shelves, drawers, or cabinets that fit your storage plan, making sure each piece is anchored securely to the structure. Measure carefully so doors open smoothly and hardware clears nearby panels. Use full-extension slides for drawers and sturdy hinges for cabinets, then test each part as you go.
Next, set the countertop on top and check that it overhangs evenly on every side. Secure it with screws or adhesive based on the material you choose.
- Confirm the storage layout matches how you cook and prep.
- Fasten every unit to blocking or framing for lasting support.
- Level the countertop before you lock it in place.
Once installed, add decorative accents only where they won’t block use, and think about nearby lighting options that improve visibility over the island. These choices help the island feel complete without crowding the work area.
Finish and Install Your Kitchen Island
Now that the structure is built and the countertop is set, you can finish the island by filling nail holes, sanding rough spots, and applying paint, stain, or sealer that matches your kitchen. Let each coat dry fully, then lightly sand between coats for a smooth, durable surface.
Add decorative finishes such as trim, panel molding, or hardware to give the island a custom look that fits your style. If you want extra function, plan lighting options before final placement, especially if you’re adding pendants or under-counter task lights.
Position the island where it leaves clear walking space and aligns with outlets, stools, and nearby cabinets. Secure any base trim or feet, then reconnect power if you installed electrical features.
Finally, clean the surface, inspect joints and edges, and make small touch-ups. Once everything looks right, your kitchen island is ready to use and will serve as a polished centerpiece.
Frequently Asked Questions
What Permits Are Needed for a Kitchen Island Addition?
You’ll usually need a building permit for a kitchen island if you’re adding electrical, plumbing, or structural changes. You may also need permits for gas lines, venting, or moving walls.
Check local rules before you start, because kitchen safety and design considerations can affect approval. Your city may require inspections, too.
If you only install a freestanding island with no utilities, you might not need one, but always confirm first.
How Much Does a Custom Kitchen Island Typically Cost?
A custom kitchen island typically costs between $2,000 and $10,000, and you can spend more for premium features. Your cost estimation depends on size, material selection, cabinetry, countertops, plumbing, and electrical work.
If you choose quartz, hardwood, or built-in appliances, your price climbs fast. You can lower costs by simplifying the design and using stock components, but custom carpentry and installation still add significant labor.
Can a Kitchen Island Include Plumbing or Electrical Hookups?
Yes, you can add plumbing or electrical hookups to a kitchen island, like giving a still table the pulse of a home. You’ll need careful plumbing installation for sinks or dishwashers, plus electrical wiring for outlets, lighting, or cooktops.
You can’t just wing it, though; you’ll need permits and a licensed pro in many places. Plan the layout early, and you’ll turn your island into a true workhorse.
What Countertop Materials Are Best for Heavy Kitchen Use?
For heavy kitchen use, you’ll want quartz, granite, or butcher block. Quartz gives you strong countertop durability and easy material maintenance, while granite handles heat and scratches well. Butcher block looks warm and works nicely if you’ll oil it regularly.
If you cook hard every day, choose a surface that resists stains, chips, and wear, and matches how much upkeep you’re willing to do over time.
How Do You Match an Island’s Style to Existing Cabinets?
Match the island’s style to your existing cabinets by echoing their door profiles, finish, and hardware, so you create cabinet harmony. You can keep style coordination strong by repeating colors or wood tones, then adding a subtle contrast in the island’s base or countertop. If your cabinets feel traditional, choose classic trim; if they’re modern, use clean lines. You’ll unify the room without making everything look identical.
Conclusion
You’ve done it—you’ve turned a simple pile of wood into a kitchen island that could practically steal the spotlight from the whole room. By planning carefully, gathering the right tools, and building with confidence, you’ve created a sturdy, stylish centerpiece you can use every day.
Add your finishing touches, step back, and enjoy the upgrade. With a little effort, you’ve learned how to build a kitchen island and made your kitchen truly your own.