Install a Kitchen Sink in 10 Easy Steps
Installing a kitchen sink can feel daunting, especially if you’re worried about leaks or damaging your countertop. You’re not alone—many people struggle to figure out where to start.
This guide to installing a kitchen sink breaks the job into 10 easy steps, with practical tips to help you feel more confident.
Start by gathering your tools, sink parts, putty, silicone, and wrenches. Then shut off the water and clear out the cabinet.
Remove the old sink and faucet. Dry-fit the new sink, and make sure it lines up.
Seal and set it, then connect the drain and P-trap.
Hook up the water lines, turn the water on, and check for leaks.
Finish by caulking the edges, cleaning up, and uncovering a few extra pro tips along the way.
Key Takeaways
- Gather tools, parts, and a matching sink, then shut off water and clear the cabinet workspace.
- Remove the old sink, faucet, drain, and any sealant, then clean the countertop opening thoroughly.
- Dry-fit the new sink, check dimensions, faucet clearance, and levelness, and adjust if needed.
- Apply plumber’s putty or silicone, set and secure the sink, then install the drain and P-trap assembly.
- Connect supply lines, turn on water slowly, test for leaks, caulk the seam, and let everything cure.
Gather Tools and Sink Parts
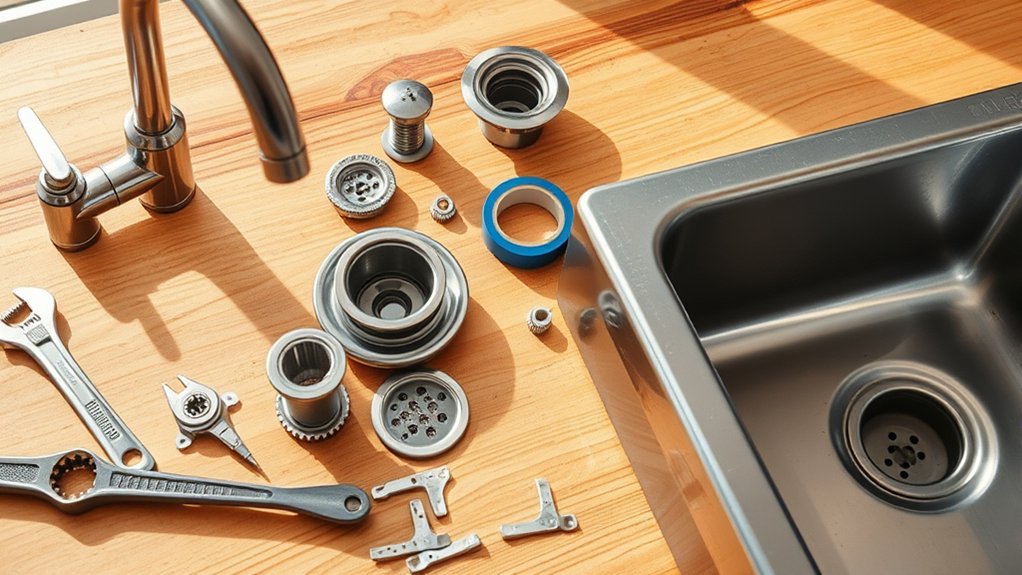
Before you start the installation, gather all your tools and sink parts so the job goes smoothly. Check that you’ve got the sink, faucet, drain assembly, clips, plumber’s putty, silicone, a tape measure, adjustable wrench, screwdrivers, utility knife, bucket, and rag.
Match every part to your sink material, because stainless steel, cast iron, and composite models may need different fittings or sealants. Read the manufacturer’s instructions now so you don’t miss a required bracket or gasket later.
Keep your tools clean and organized; good tool maintenance saves time and helps you avoid damage during the install. Lay everything out on a towel or cardboard so small pieces don’t roll away.
Inspect the sink for chips, dents, or cracks, and verify the drain opening size before you begin. When you prepare each item in advance, you’ll work faster, make fewer mistakes, and move confidently into the next step.
Shut Off Water and Clear the Cabinet

Now that your tools are ready, turn off the water supply to the sink and open the faucet to relieve any remaining pressure. Place a bucket or towel under the supply valves to catch drips, then check that both hot and cold lines are fully closed.
Turn off the sink’s water supply, open the faucet to release pressure, and confirm both lines are fully closed.
This simple step supports water conservation and keeps your workspace dry while you prep the cabinet. Next, clear everything from inside the base cabinet: cleaners, bins, liners, and anything else that blocks access. Set items aside where they won’t get wet or damaged.
If you find a shutoff valve that sticks, don’t force it; note it for replacement later. Take a quick look at the exposed piping and make sure the setup appears consistent with local plumbing codes.
With the cabinet empty, you’ll have room to work comfortably, protect finishes, and avoid unnecessary delays once the sink area is open.
Remove the Old Sink and Faucet

With the water off and the cabinet cleared, you can remove the old sink and faucet. Start by disconnecting the supply lines and trap, then loosen the mounting clips or brackets that hold the sink in place. If sealant grips the rim, cut it with a utility knife from inside the bowl. Lift the faucet out next, removing any nuts or washers underneath. Keep a towel handy to catch leftover water and protect the cabinet floor.
As you work, note how the old fixture sits in the countertop opening. That reference helps when you compare decorative sink options or trace historical sink designs later. Once the sink loosens, lift it straight up and out, watching for sharp edges and heavy porcelain. Scrape away old caulk, putty, and debris from the cutout so the area is clean. Take your time, and avoid prying against the countertop, since that can chip the surface.
Dry-Fit the New Sink
Set the new sink in the cabinet opening to make sure it fits without binding. Check that it sits level and lines up with the countertop cutout. Then make sure there’s enough clearance for the faucet and any other fixtures.
Check Cabinet Opening
Before you drop the new sink in place, check that the cabinet opening gives it enough room to fit cleanly. Measure the width, depth, and front-to-back clearance, then compare those numbers with the sink’s outer rim and bowl dimensions.
If the cabinet frame crowds the basin, trim only what’s necessary and keep cabinet reinforcement intact. You should also confirm plumbing accessibility so supply lines, drains, and shutoff valves won’t bind once the sink sits in position.
Slide the sink into the opening without sealant, and watch for contact along the edges, braces, or partitions. Leave enough space for clips and future maintenance.
If anything rubs, remove the sink and adjust the opening before moving on.
Test Sink Alignment
Now is the time to test the sink’s alignment by dry-fitting it in the opening. Lower the sink into the cabinet cutout and center it carefully. Check that the rim sits evenly on all sides and that the basin doesn’t crowd the cabinet walls.
If the fit looks off, shift the sink until the edges line up cleanly with the countertop opening. Use a level to confirm the sink sits straight and doesn’t rock, since sink stability matters before you move forward.
Look for uniform contact around the perimeter so you can catch small issues now, not later. Make any needed adjustments, then lift the sink out and reset it. This dry fit helps you confirm countertop clearance and prepare for a smoother installation.
Verify Faucet Clearance
Dry-fit the faucet to make sure it clears the sink and any nearby backsplash or window ledge. Set the sink in place, then position the faucet and check the faucet height from every angle. You want enough clearance space so the handle lifts freely and the spout doesn’t hit tile or trim. If anything feels tight, adjust now before you seal the sink.
| Checkpoint | Feeling |
|---|---|
| Spout clears rim | Relief |
| Handle moves freely | Confidence |
| No backsplash contact | Calm |
| Enough clearance space | Peace |
Step back and look at the whole setup. A few minutes now can save you from a frustrating redo later. If the fit looks clean, you’re ready to move on with confidence.
Seal and Set the Sink
Once the sink fits properly, run a continuous bead of plumber’s putty or silicone caulk around the rim to create a watertight seal. Keep the bead even so it supports clean sealant application and helps you control sink positioning as you lower the basin.
With a helper, set the sink into the cutout and press down firmly so the sealant spreads without gaps. Check the front edge and corners to make sure the sink sits flat and centered. Wipe away any excess material with a damp cloth before it starts to cure.
Then secure the sink from below with the clips or mounting hardware included with your model, tightening them gradually in a crisscross pattern. This keeps pressure balanced and prevents shifting. Recheck the rim after tightening, and add a little more sealant if you spot a gap.
Let the seal cure for the recommended time before you add weight or water.
Install the Faucet and Strainer
With the sink secured and the sealant curing, you can move on to the faucet and strainer. Check the sink’s mounting holes and confirm faucet compatibility before you start. Set the faucet into place, aligning any gasket or base plate exactly as the manufacturer directs.
From below, tighten the mounting hardware evenly so the faucet sits straight and doesn’t wobble. Don’t overtighten, or you could crack the finish or distort the seal.
Next, install the strainer in the drain opening. Apply the plumber’s putty or seal supplied with the kit, then press the strainer body firmly into position. Choose a strainer material that matches your sink and resists corrosion, especially if you’re using stainless steel or composite.
Add the washer, gasket, and locknut underneath, then tighten them until the strainer feels secure. Wipe away excess putty or sealant, and inspect the faucet and strainer for a clean, snug fit before you continue.
Connect the Drain and P-Trap
Align the drain opening with the sink tailpiece so they line up cleanly. Then, install the P-trap assembly beneath the sink and connect each section snugly. Finally, tighten all the connections to create a proper seal and prevent leaks.
Align Drain Opening
Before you tighten the plumbing, line up the sink drain opening with the P-trap so the pieces meet cleanly without strain. Check drain pipe alignment from under the cabinet and adjust the tailpiece until it points straight into the trap arm.
Confirm sink flange positioning above the basin so the drain sits centered and even, not tilted or pinched. You want every joint to meet squarely, with no sideways pull that could loosen seals later.
- A bright metal drain glowing under the basin
- Straight piping meeting like puzzle pieces
- Your hand guiding the trap into place
- A centered opening framed by the sink bowl
When the parts look balanced, hold them steady and verify the path feels natural. Then you’re ready for the next step.
Install P-Trap Assembly
Now connect the P-trap assembly under the sink, fitting the curved trap to the tailpiece and the trap arm so the drain can flow smoothly into the wall line. Choose p trap materials that match your plumbing setup, such as PVC, ABS, or chrome, and check each part for clean edges and proper sizing.
Hold the pieces in place and confirm drain pipe alignment before you join them, since a slight offset can cause leaks or slow drainage. You should keep the trap centered below the drain opening and make sure the arm slopes gently toward the wall.
If the parts don’t line up, adjust the lengths or reposition the fittings until everything sits naturally. A careful fit now helps the sink drain efficiently later.
Tighten All Connections
Once the drain and P-trap are aligned, tighten the slip nuts by hand first, then finish them with pliers until they’re snug. Check each joint and make sure the washer sits flat, so the drain seals cleanly.
If you added pipe insulation under the cabinet, keep it clear of the trap and tailpiece. Wipe away dust, then run water and watch for drips. If you spot moisture, give the connection a small turn, not a hard crank.
Keep nearby sink accessories organized so you can reach them fast during testing.
- A chrome trap under the basin
- A dry towel beneath the pipes
- A flashlight on the cabinet floor
- Water flowing smoothly into the drain
Hook Up the Water Lines
With the sink in place, you can hook up the water lines so it’s ready to use. Connect the hot and cold supply tubes to the shutoff valves, then attach them to the faucet inlets with the correct wrench size.
Check that the pipe materials match your setup, especially if you’re joining flexible braided lines to copper or PEX. Keep each connection straight so you don’t cross-thread the fittings.
Before you finish, confirm the water pressure is appropriate for your fixture and home plumbing. If a line feels too stiff or too short, replace it rather than forcing a bend.
Hand-tighten first, then give each nut a snug quarter turn with pliers or a basin wrench. Make sure the tubes don’t rub against sharp edges or kink under the sink. Once everything sits neatly in place, turn the valves on slowly and let the system settle.
Test for Leaks and Tighten Fittings
Turn the water on slowly and inspect every connection for drips, seepage, or spray. Watch the supply lines, shutoff valves, and drain joints as the water builds pressure. If you spot moisture, stop the flow and make small fitting adjustments with a wrench, then test again. Stay patient; careful leak detection now prevents trouble later.
Turn the water on slowly and watch every connection closely for drips, seepage, or spray.
Run both hot and cold water separately, and listen for hissing or rattling that can signal a loose seal. Wipe each joint with a dry paper towel so you can see fresh wetness fast.
- A bead of water forming on a nut
- A dry towel catching the first dark spot
- A quiet cabinet with steady pipes
- A wrench turning a stubborn fitting a quarter turn
Check the sink basin and underside from multiple angles. When everything stays dry, you’ve finished this test.
Caulk the Edges and Clean Up
After the plumbing is dry, run a neat bead of kitchen caulk along the seam where the sink meets the countertop, then smooth it with a damp finger or caulk tool for a clean, sealed edge. Work slowly so you can caulk edges evenly and avoid gaps where water could slip in.
Wipe away extra caulk right away with a damp cloth before it skins over. Check the front, sides, and corners, and add a touch more if you spot thin spots or bubbles. Once the bead looks consistent, leave it alone to cure for the time listed on the tube.
Next, clean area around the sink, faucet, and counter with warm water and a mild cleaner. Remove tape, tools, and any debris, then dry the surface so it looks polished. Finally, inspect your work one more time. A smooth caulk line and tidy cleanup help protect the installation and give your new sink a finished, professional look.
Frequently Asked Questions
How Do I Choose the Right Sink Size for My Cabinet?
Measure your cabinet’s interior width, depth, and height, then choose a sink that leaves at least 1 to 2 inches of clearance on each side. You’ll want the bowl size to match your daily use without crowding plumbing or storage.
Check countertop compatibility so the cutout fits cleanly, and confirm faucet integration so the sink deck or holes line up with your fixture. Always follow the manufacturer’s specs before you buy.
Do I Need a Plumber for This Kitchen Sink Installation?
You don’t always need a plumber, but hiring one can save you headaches like a map saves you from getting lost. If you’re comfortable cutting, sealing, and connecting lines, you can handle it yourself.
Still, check Plumbing codes and your Sink warranties before you start. Some warranties require professional installation, and local rules may demand a licensed pro for gas lines, drainage changes, or tricky hookups.
Which Sink Material Is Easiest to Maintain?
Stainless steel’s easiest for you to maintain because it resists stains, wipes down fast, and won’t need special cleaners. You’ll still want to manage Cleaning frequency by drying it after use and giving it a quick wash each day. Material durability also matters, and stainless steel holds up well against dents and heat. If you want even less upkeep, choose a satin finish that hides water spots better.
Can I Install a Garbage Disposal at the Same Time?
Yes, you can install a garbage disposal at the same time, if your sink and plumbing allow it. Check Garbage disposal clearance, drain alignment, and Installation compatibility before you start.
You’ll also need a disposer-ready sink flange and enough space under the cabinet. If you’re replacing an old sink, this is often the easiest time to add one.
Test for leaks after you tighten everything and connect the wiring.
How Long Should Kitchen Sink Installation Typically Take?
You’ll usually spend 2 to 4 hours installing a kitchen sink, but it can feel like a puzzle with plumbing pieces snapping into place. If your setup is simple, you may finish sooner; if you’re doing faucet replacement or a dishwasher hookup, expect extra time. Older pipes, stubborn seals, or cabinet adjustments can stretch the job to half a day. Plan carefully, and you’ll keep the project moving smoothly.
Conclusion
With your new sink in place, your kitchen is ready to shine. You’ve tackled a project that can feel mountain-sized, but step by step, you made it happen.
Give every connection one last look, wipe away any mess, and enjoy the fresh, clean upgrade. Before you know it, your kitchen sink will be working like a charm and looking so good it’ll almost steal the show from the rest of the kitchen.