How to Replace a Kitchen Sink in 10 Easy Steps
A leaky, outdated, or awkward kitchen sink can make everyday chores frustrating—and replacing it may seem like a bigger job than you’d like to tackle. You’re not alone; many people struggle to figure out where to start.
This guide to how to replace a kitchen sink in 10 easy steps will help you work through the process with confidence.
Replace a kitchen sink by gathering your tools, then shutting off the hot and cold water and clearing the cabinet. Disconnect the drain and supply lines, remove the old sink, and measure the opening against the new one.
Dry-fit the sink, apply plumber’s putty or silicone, and lower it into place. Reconnect the drain and water lines, turn the water back on, check for leaks, and seal the edges neatly.
Keep going for the full step-by-step process.
Key Takeaways
- Gather tools, new sink parts, and safety gear, then measure the cabinet opening and dry-fit the sink for compatibility.
- Turn off hot and cold water valves, open the faucet to drain pressure, and clear the cabinet and countertop area.
- Disconnect supply lines, drain trap, and drain assembly carefully, then lift out the old sink.
- Apply plumber’s putty or silicone, set the new sink into position, and press evenly until it sits flush.
- Reconnect plumbing, restore water, check for leaks, and seal the edges with silicone for a clean finish.
Gather Your Sink Replacement Tools

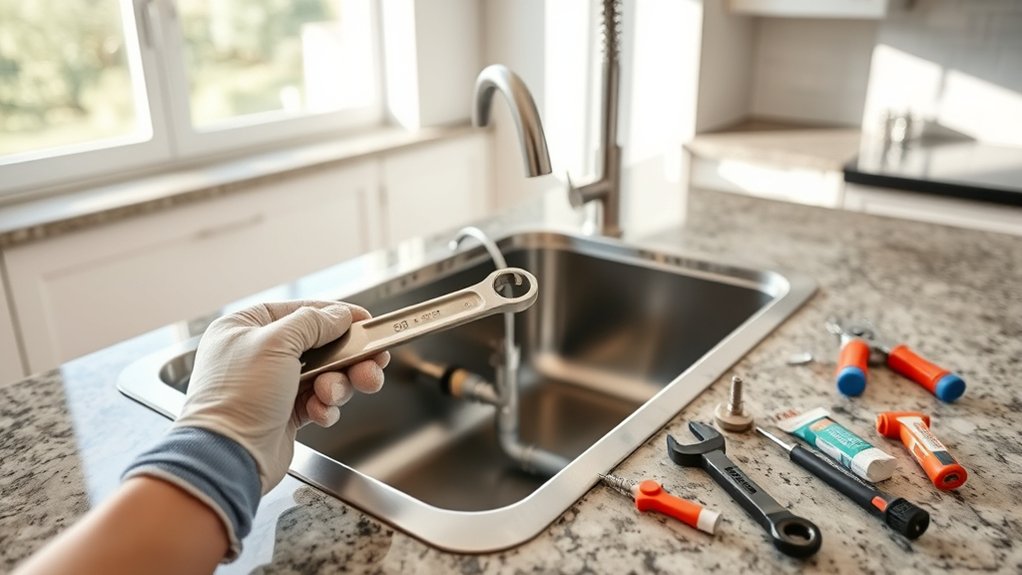
Before you start removing the old sink, gather the tools and materials you’ll need so the job goes smoothly. You’ll want a basin wrench, adjustable wrench, screwdriver, putty knife, utility knife, bucket, plumber’s putty, silicone caulk, measuring tape, and towels.
If your new sink includes clips, supply lines, or a drain kit, keep those nearby too. Check each tool for wear, since tool maintenance helps you avoid stripped fasteners, dull blades, and wasted time.
Lay everything out where you can reach it without searching mid-task. Safety precautions matter here, so wear gloves and safety glasses, and make sure your workspace stays dry and clutter-free.
Keep a flashlight handy for tight spots under the sink, and test-fit your new parts before you begin. When you prepare your tools carefully, you work faster, reduce mistakes, and set yourself up for a cleaner, easier replacement.
Shut Off Water And Clear The Sink Area

Now that your tools are ready, shut off the hot and cold water supply valves under the sink and turn on the faucet to release any pressure left in the lines. Let the flow stop completely, then check that both handles no longer deliver water.
Shut off the supply valves, open the faucet, and confirm the lines are fully drained.
This simple step protects you from surprises and keeps the workspace dry. Next, clear everything from the cabinet and countertop so you’ve got room to move. Remove cleaners, trash bins, and stored items, and place them somewhere safe.
Wipe away crumbs, grease, and standing water so the area stays clean and easy to inspect. Take a moment to look at the surrounding sink materials, including the countertop edge and cabinet base, so you can spot any damage before you continue.
Keeping the space open also helps you work faster and avoid bumping tools against nearby surfaces. Once the area’s clear, you’re ready for the next phase.
Disconnect The Faucet And Drain Lines

Make sure the water supply is fully shut off before you disconnect anything under the sink. Then, use a wrench to loosen the drain connections and carefully separate the drain lines. Keep a bucket or towel nearby to catch any leftover water.
Shut Off Water Supply
First, shut off the sink’s water supply at the shutoff valves under the cabinet, turning them clockwise until they stop. Then open the faucet to relieve any remaining water pressure in the lines. Check both hot and cold handles, and let the last drips run out into the basin.
If the cabinet is damp, wipe it dry so you can work safely. Inspect the supply tubes and nearby pipe insulation for wear or moisture while everything is exposed. This quick check helps you spot leaks before you disconnect anything.
Keep a small bucket or towel nearby for the few drops that may remain in the faucet body. Once the water stops flowing, you’re ready to move on with confidence and protect the surrounding area from unnecessary mess.
Loosen Drain Connections
With the water already shut off, disconnect the faucet supply lines and loosen the drain connections under the sink. Place a bucket and towel below the trap to catch leftover water, then use pliers or a wrench to loosen the slip nuts.
Turn them counterclockwise, but don’t force stuck fittings; a little penetrating oil can help. Remove the P-trap, extension pipes, and any clips holding the drain assembly in place.
As you work, inspect each joint for buildup, leaks, or corrosion so you can plan simple Drain pipe maintenance later. These Kitchen plumbing tips keep the area cleaner and make reinstalling easier.
Keep parts organized in order, and cap exposed lines if you won’t reconnect them right away.
Remove The Old Kitchen Sink
Before you remove the old kitchen sink, shut off the water supply to prevent leaks or spills. Then disconnect the plumbing lines so the sink is free from the countertop. Once everything is detached, you can safely lift out the old sink.
Shut Off Water Supply
Start by shutting off the hot and cold water supply valves under the sink, then turn on the faucet to relieve any remaining pressure. This step keeps water from spraying while you work and helps you confirm the valves are fully closed.
Check the handles for stiffness or leaks, since older pipe materials can hide wear that affects shutoff performance. If the water pressure drops only after a few seconds, that’s normal; the lines just need time to drain.
Wipe the area dry so you can spot drips right away. If the valves don’t stop flow completely, you may need to shut off the main supply before moving on. Taking a minute here protects your cabinets, floor, and tools from unnecessary damage.
Disconnect Plumbing Lines
Next, place a bucket or pan under the drain trap and loosen the slip nuts on the P-trap, supply lines, and drain assembly so you can separate the old sink from the plumbing. Keep a towel nearby to catch drips, and wear gloves for Plumbing safety.
Use a basin wrench or pliers to disconnect the water lines, then unthread the trap carefully so you don’t twist nearby joints. If the fittings resist, check for corrosion before forcing them.
Note the Pipe materials you see, since PVC, chrome, and brass may need different handling. Once everything is free, cap or tape open ends to keep debris out.
Then lift out the sink and set it aside, clearing the cabinet for the next step.
Measure The Cabinet Opening And New Sink
With the old sink removed, measure the cabinet opening from side to side and front to back, then check the depth from the top edge of the cabinet to any obstructions below. Record every dimension in inches, and recheck each one for Measuring accuracy before you shop.
Measure the cabinet opening side to side, front to back, and depth below, then double-check every dimension before shopping.
Compare those numbers with the new sink’s cutout size, overall width, bowl depth, and flange clearance so you know it’ll fit without forcing the cabinet. If your opening has an uneven lip or damaged support rails, inspect them now for cabinet stability, since a weak frame can shift the sink later.
Measure the countertop cutout too, because the basin must sit cleanly under or over that opening, depending on the style you chose. Keep a tape measure, notepad, and manufacturer specs handy, and note any plumbing or disposal clearance that might affect placement.
Careful measurements now help you avoid returns and make the rest of the installation smoother.
Dry-Fit The New Sink
Set the new sink into the opening, then check that it sits straight and centered. Make sure it fits snugly against the countertop, with no gaps or uneven edges. Once everything looks right, mark the mounting points so you can secure the sink later.
Check Sink Alignment
Before you fasten anything down, dry-fit the new sink to make sure it sits straight in the opening. Set it into place and check that the rim looks even on all sides.
Press lightly at each corner to test sink stability, and watch for rocking or gaps that signal uneven support. If the basin shifts, make small alignment adjustments now instead of after sealing.
Slide it a bit left, right, forward, or back until it centers cleanly and the edges line up with your marks. Keep checking from multiple angles so you catch any tilt early.
When the sink rests flat and steady without force, you’ll know the fit is right and you’re ready for the next step.
Confirm Countertop Fit
Now that the sink is aligned, dry-fit it against the countertop opening to confirm it sits correctly all the way around. Lower it gently and check for even contact on every side.
This lets you see whether the Countertop material leaves enough support and whether the cutout matches the sink’s outer rim. If the opening feels tight, don’t force the basin. Instead, compare the fit with the manufacturer’s template and inspect the Edge finishing for irregular spots.
A clean edge should let the sink sit flush without rocking. Watch for gaps, overhangs, or points where the rim catches.
When everything looks balanced, lift the sink out carefully and set it aside. A precise dry-fit now helps you avoid problems when you install it later.
Mark Mounting Points
With the sink dry-fit in place, mark the mounting points on the underside of the countertop or along the cabinet supports, depending on your sink style. Use a pencil to trace each hole and note the installation orientation so you can realign it later without guesswork. Keep the sink steady while you check spacing for the faucet and drain.
| Point | What to mark | Why it matters |
|---|---|---|
| Front edge | Rim line | Sets alignment |
| Side supports | Mounting brackets | Secures the sink |
| Rear cutout | Clip locations | Prevents shifting |
After marking, lift the sink out and inspect your lines. Clear, accurate marks make the next installation step faster and help you avoid crooked placement or stressed connections.
Apply Sealant And Lower The Sink Into Place
Apply a continuous bead of plumber’s putty or silicone sealant around the underside of the sink rim, then carefully lower the sink into the opening. This sealant application creates a watertight barrier and helps the sink sit snugly on the countertop.
Keep your hands close as you guide the basin down, and align it with the marks you made earlier. During sink lowering, press gently but firmly so the rim contacts the surface evenly all the way around.
If the sink shifts, lift it slightly and reset it before the sealant starts to set. Once it’s in position, check the reveal from above and make sure the edges look even.
Wipe away any excess sealant that squeezes out with a damp cloth before it hardens. Then, apply steady pressure for a few minutes so the sink bonds properly and stays level while you prepare for the next step.
Reconnect The Drain And Water Lines
Once the sink is secure, reconnect the drain assembly and water lines so everything is ready for use. Fit the tailpiece, trap, and other drain parts back together in the same order you removed them. Hand-tighten each slip nut first, then give them a gentle final turn with pliers if needed. Keep the Drain installation aligned so the pipes sit straight and don’t strain the new sink.
Next, attach the hot and cold supply tubes to the faucet valves. Use a Water line adjustment to position each line without kinking or twisting. If a line feels too short, replace it with a longer connector instead of forcing it. Make sure the hoses clear moving cabinet doors and garbage disposals. Restore the shutoff valves slowly once both sides are connected, and confirm the faucet handles move smoothly. Keep the work area dry as you finish and organize tools.
Check For Leaks And Tighten Connections
Turn the water back on and watch every connection closely for drips, seepage, or loose fittings. Check under the sink, around the trap, and at each supply line while the faucet runs and the drain fills.
If you spot moisture, shut the water off and tighten the fitting a little at a time, then test again. Don’t force parts; over tightening can damage threads or washers and create another leak. Wipe each joint dry so you can see fresh water right away.
This step matters for leak prevention and connection security because a tiny drip can waste water and damage cabinets over time. Run both hot and cold water, then let the sink sit full for a few minutes. Look again after draining, since some leaks appear only under pressure.
When everything stays dry, you’ve confirmed the connections are sound and ready for regular use.
Seal The Edges And Caulk The Sink
With the sink secured and leak-free, you can seal the edges to finish the installation. Clean the rim and countertop with a dry cloth, then apply painter’s tape for crisp lines. Use a steady bead of silicone to Seal edges around the sink opening, keeping the line even and unbroken. Smooth it with a damp finger or caulk tool before it skins over.
Seal the edges with a smooth bead of silicone for a clean, watertight finish.
This step keeps water from seeping beneath the basin and protects the cabinet below. When you Caulk sink joints, work slowly so the sealant fills every gap. Remove the tape right away for a sharp finish.
- A glossy white bead tracing the sink’s curve
- A clean countertop edge with no gaps
- Water beading harmlessly on the sealed seam
Frequently Asked Questions
Can I Replace a Kitchen Sink Without Replacing the Countertop?
Yes, you can replace a kitchen sink without replacing the countertop, as long as the new sink fits the existing cutout and mounting style. You’ll need to check countertop compatibility, sink dimensions, and faucet holes before you buy.
If the opening matches, you can swap it with basic tools and careful sealing. Follow DIY installation tips, and you’ll avoid damaging the countertop while giving your kitchen a fresh, functional upgrade.
How Long Does a Sink Replacement Usually Take?
A sink replacement usually takes you 2 to 4 hours if everything fits and you’re comfortable with DIY plumbing. If your old Sink fixtures are stuck, your countertop needs extra sealing, or the drain lines need adjustment, it can take longer.
You’ll move faster if you’ve gathered tools, shut off water, and checked measurements first. For a first-timer, plan on half a day and expect a few surprises.
Do I Need a Plumber for a Kitchen Sink Replacement?
You don’t always need a plumber for a kitchen sink replacement, but hiring one can save you hassle. If you’re comfortable disconnecting plumbing, sealing the sink, and checking for leaks, you can do it yourself.
Still, DIY risks include water damage, poor sealing, and fit issues. Compare plumber costs against your time, tools, and confidence. If your setup’s complex or corroded, call a pro.
What Sink Materials Are Best for Durability and Maintenance?
Stainless steel, cast iron, and composite granite are your best bets for durability and easy care. You’ll love stainless steel for its strength, stain resistance, and simple wiping.
Cast iron lasts long and looks rich, but it’s heavy. Composite granite fights scratches and heat well.
Check faucet compatibility and plumbing connections before you buy, so you won’t face costly surprises. Choose a finish that fits your cleaning style and kitchen use.
Can I Reuse My Existing Garbage Disposal During Installation?
Yes, you can often reuse your Garbage disposal during Reuse installation if it still works well and matches the new sink’s mounting style. You’ll need to disconnect it carefully, check the flange, gasket, and drain alignment, then reinstall it securely.
If the unit leaks, hums, or doesn’t fit, replace it instead. Always follow the manufacturer’s instructions and turn off power before you start to keep yourself safe.
Conclusion
You’ve done the heavy lifting, and your new sink should now shine like a fresh window after rain. With the water lines snug and the sealant set, your kitchen is ready to flow again.
Give every connection one last look, then wipe away any stray caulk like polishing the final brushstroke on a canvas. If you stayed careful through each step, you’ve turned a messy job into a clean, sturdy upgrade. Follow these steps to replace a kitchen sink, and it’ll serve you well for years to come.